How To Secure A Website? Better Website Security In 6 Steps
2021 January 8
With attacks on websites getting more and more regular, it's important to have your project secure. And you can do it without spending a dime.
In this tutorial, I’ll give you step by step instructions on how to secure a website for free. We’ll go through:
- Preventing brute force attacks in multiple ways.
- Hiding your WordPress login portal.
- Backing up your website.
- Installing an SSL certificate.
If you complete every step in this tutorial, your website will be like a fortress.
The best part is, you won’t need to spend a dime on this.
So to get an even start, I’ve created a simple website that’s hosted on SiteGround (don’t worry, you can do the same on any provider). I didn't do any configurations and even don't have an SSL certificate so there's this "NOT SECURE" badge following my website name. Let's work through this together!

Step 1: Logging in to WordPresStep 1: Log in to your WordPress dashboard
Let’s start with the basics and simply log in to the WordPress dashboard. You can reach it by adding /wp-admin/ next to your domain like this:

Now, simply enter your login information and you’ll be able to reach the WordPress admin panel.

Once there, take a look at the “Plugins” tab. We’ll be working with this mostly today.
Step 2: Brute force protectionStep 2: Brute Force Protection
Find the Plugins tab and select “Add New.” Once in, search for iThemes security and click “Install Now.” It should take just a few seconds until the “Activate” button appears. Click on that.

Now, the new tab called “Security” has appeared on your WordPress menu. Let’s go there and click on “Secure Site.”

In a moment, you'll be redirected to a different page.
Here, you need to type in your email address and click the “Activate Network Brute Force Protection” button.

Right away, we tackle one of the website security issues – hackers trying to force their way into your website. But it’s a very broad measure and there is still plenty securin’ left to do.
Step 3: Hide login portalStep 3: Hide Your WordPress Login Portal
The best security and prevention. If the hacker cannot get to your login portal, they won’t be able to force their way into the website in the first place.
So we’ll be able to hide the login portal with the same plugin. Go to the “Security” once again and you should be able to find a small “All” button there. It will give you all the options possible.
Once in, find the “Hide Backend” option and select “Configure Settings.”

You should enable the “Hide Backend Feature” checkbox.
So instead of the default “wp-login” text, you can use something unique. I picked “emit-go” and clicked on “Save Settings.”

This might look like a very small change, but it’s actually a very big deal when making your website secure. With this single change, you are preventing most of the automated attacks or amateur hackers.
But it can get even better.
Step 4: Stopping brute force attacksStep 4: Stopping Brute Force Attacks
Haven’t we already done that? Oh yeah, we did stop some of the amateur attacks. Now it’s time to get even more protection. This one is targeted towards attacks when hackers use advanced software to guess millions of different login and password combinations per second.
Once again, let’s go to the “Security” tab and click on “All.” This time, let’s find the “Local Brute Force Protection” option and click on “Configure Settings.”

First of all, let's limit the login attempts per IP.
So in the main Local Brute Force Protection page find the login attempts setting and set it from 10 to 5. Just to be on the safe side.

Now you can click on that small "Global Settings" link and scroll down till you find "Ban Threshold". Change it to 2 and scroll down once more. Click the “Add my current IP to the White List.” Don’t forget to “Save Settings.”

What you did just now is enabled the Login Attempt Limiter and a bunch of other security measures while making your IP immune to them.
Because I know I do sometimes (often) forget my password and try like a gazillion different variations of the same password till one fits in. So you don’t want to be banned from your own website and that’s why you need to whitelist your own IP address.
Step 5: Website backupsStep 5: Website backups
I promised to make a fortress of your website, the fortress I will make. Not entirely essential, website backups can be lifesavers when you are wondering how to make website secure. Why? Something always goes wrong and having a possibility to rewind is like that extra can of beer in the back of the fridge.
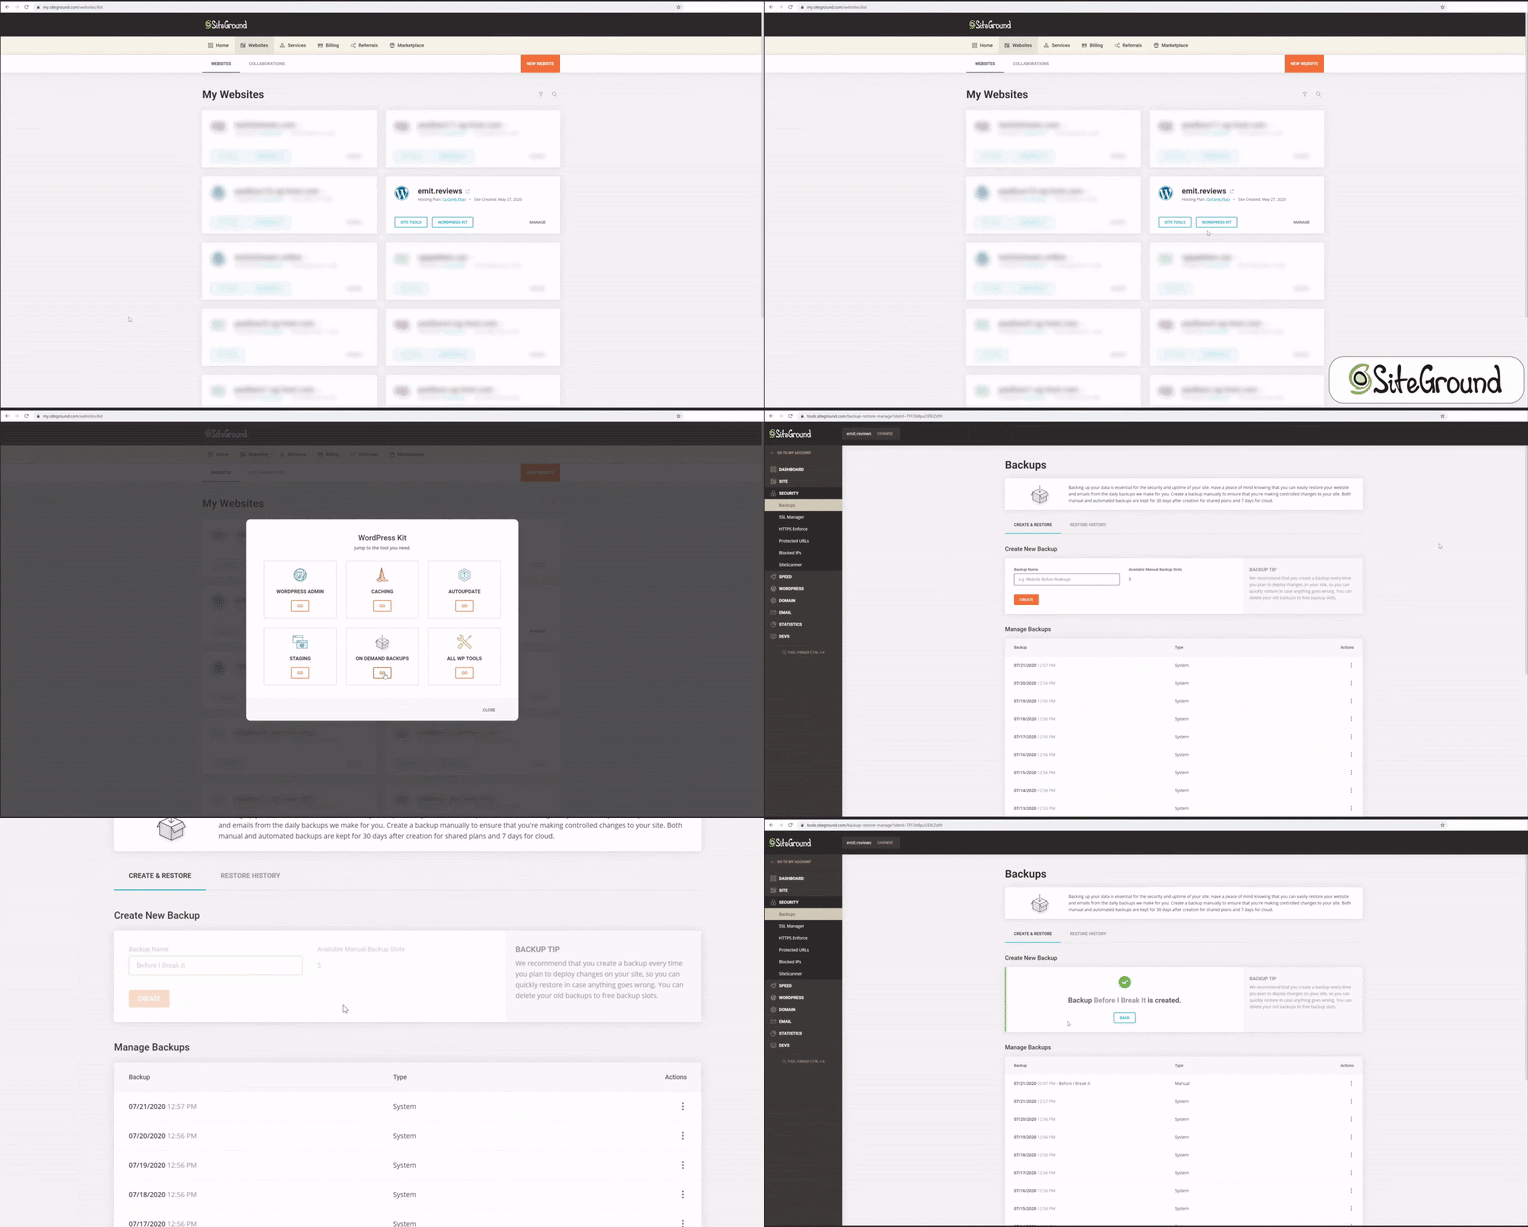
So for example, using SiteGround I already have an automated backup feature. It’s built-in and backs my website every day so I can restore it to the previous version at any time.

But this is a free tutorial and you might not be using SiteGround or another provider that has this feature.
So let’s quickly go to the “Plugins” and choose “Add New.” Now, in the search tab, enter “Updraft” – install and activate it.

Once installed, you'll be taken to the setup wizard/guide. I skipped it for now.
You'll find the plugin itself under "Settings" –> "Updraft".
So let's set up our backups. For “File Backup Schedules” I like to set it to Weekly – I’ll get my files and databases backed up once a week. Now for the backup storage, I always pick Google Drive (or any cloud storage option available to you).

Why’s that? Well, you can reach it from anywhere and it won’t simply break. The problem with storing your data on the computer is that if your hard drive dies, you might not be able to restore it.
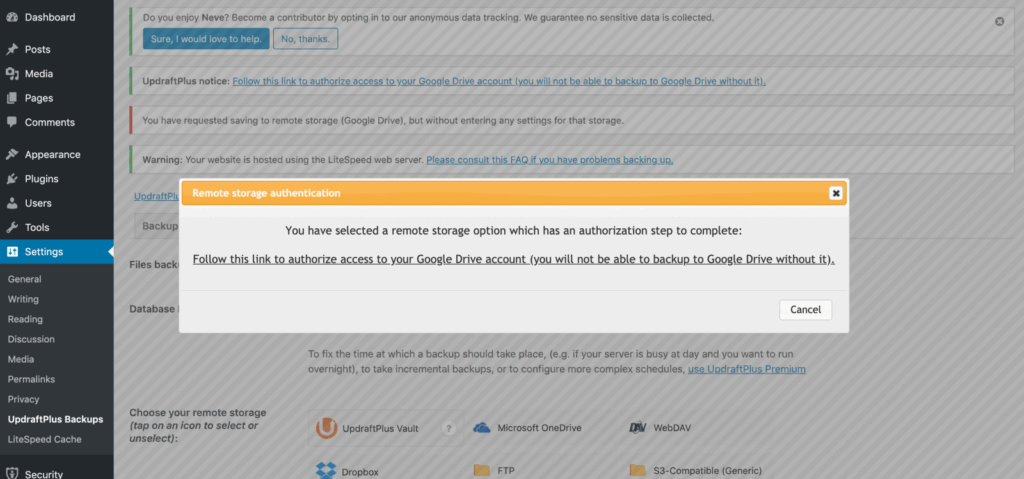
Now, save the changes and you’ll need to give UpDraft access to your Google Drive. A popup will appear and you'll simply need to follow the steps.

Extra tip: I like to use throwaway and not my actual email if I give some app or provider access to it. That’s just that “playing it safe” approach, no matter how trustworthy the app looks.
Once you have your first backup done, you'll be able to restore it from "Existing Backups." Simply click on the "Restore" button.

Step 6: Installing SSLStep 6: Installing an SSL Certificate
I left out the most important for the dessert. As you can see, the search bar still says “NOT SECURE” next to my website name. Why’s that if we did all of this security stuff? For nothing? Na-ah, that, ladies and gentlemen, shows that this website does not have a valid SSL certificate installed and activated.
“Yes yes, Emit. Please stop, we know that already. The name of this section says that.”
Okay, so first some theory. SSL certificate or Secure Sockets Layer basically is a tunnel between your server and the user. That tunnel uses various encryption methods hiding the data that’s being exchanged. So if someone is fishing for passwords or other information, they’ll get absolutely nothing.
Most of the reputable web hosting companies give free lifetime SSL certificates. You just need to find the setting to activate it.
For example, here at SiteGround, I would need to go to my “Site Tools,” find the “Security” tab, and locate “SSL Manager.” All that’s left to do is choose “Let’s Encrypt” and click on the “Get” button.

That’s it, the “NOT SECURE” is changed into a green lock instantly.
So my recommendation here is to use a provider that’s providing you with a free SSL – like Hostinger, Bluehost, or again – SiteGround. But if you’re with someone else right now, I have a separate video on how to install SSL yourself for free.
Good PracticesHow to Secure a Website – Good Practices
If you followed this tutorial on how to secure a website, you already have your website security way better than average. But many many many attacks happen every day and even the most secure websites are vulnerable.
Even Twitter was hacked not so long ago. Because an employee mishandled information. That’s “social engineering.”
So make sure to be smart:
- Use strong passwords.
- Don’t give your passwords to anyone.
- Don’t click on anything suspicious.
I hope this tutorial helped you secure your website. Don’t forget to leave your questions and tips in the comment section down below.
Also mentioned in:
Hostinger Review – Has The Fame Ruined My Favorite Host?SiteGround Review – The Best Your Money Can Buy?